
The D7250 Dental Code is one of the codes included in the Current Dental Terminology (CDT) code set, which is a product of the American Dental Association (ADA) to provide a uniform language for dental procedures. Having this standard set of terms helps your dentist, the insurance company, and you to communicate in a very transparent way. Knowing what these codes mean is equivalent to having the necessary knowledge before making any health decisions.
Our article is a complete and simplified patient guide to the D7250 dental procedure code. We will explain in detail what surgical extraction is, describe the top-notch medical materials used for your safety and to facilitate healing, and discuss the necessary aftercare steps for a gentle recovery. Knowledge of the treatment will give you more control and power. Instead of just being a passive patient, you will become an active member of the dental wellness team.
What is the D7250 Dental Code?
The CDT code D7250 is a description of the surgical procedure called “surgical removal of an erupted tooth requiring elevation of mucoperiosteal flap and removal of bone and/or sectioning of tooth.” The definition here comprises very specific medical terminology that basically tells the oral surgeon the materials and techniques he must use. We can explain this technical description in simple words, focused on the patient. A D7250 operation is a surgical one, not a simple extraction of the tooth; it is a minor surgical intervention for teeth that cannot be removed by a dentist with standard forceps.
Which Signs Will Your Dentist Use to Show That the D7250 Procedure Is Needed?
Dentists and oral surgeons only advise a D7250 surgical extraction after a complete clinical examination and radiographic analysis. They decide on such a complicated operation as a solution to prevent complications that may arise during the extraction of a tooth. A broken tooth with the fracture line going deep below the gum, and this makes it impossible to securely grasp the tooth with dental forceps is a typical example of the kind of clinical situations that lead to the necessity of a D7250 code. One more main deciding factor is a tooth that has large, curved roots or hypercementosis, where the root surface is abnormally thick and has become fused with the bone.
The molars, especially wisdom teeth, may have several roots that branch off or curve in complex ways, thus making them suitable for this surgical method. Besides that, your dentist will decide on this procedure in the case of any tooth where the direct approach necessitates temporarily taking away a small portion of the jawbone around it. The controlled removal of this bone opens up a clear and safe route for the extraction of the tooth, thus lessening the total force applied and greatly lowering the chances of the inadvertent tooth fracture.
Standardized Materials and Products Used in a D7250 Procedure
Several medical-grade materials and products are used in the D7250 procedure, and each one of them was selected for the greatest healing effect, safety, and reliability. By becoming familiar with these materials, you can be sure that the surgical code is performed at a very high standard of care.
1. Local Anesthetics for Complete Patient Comfort
Before an operation locally, the comfort of the patient is fully ensured by the oral surgeon through the administration of a local anesthetic. To perform an injection, amide-type anesthetics are used, and lidocaine is the most common and trusted one. Along with the anesthetic, many surgeons today also add vasoconstrictors like epinephrine. This coupling not only offers a very deep numbness of the exact spot where the surgery is done but also helps to lower bleeding in the area during the operation to a minimum.
Thus, the operation is carried out more easily and there is less chance of problems. The best local anesthetics in dentistry all share a common thing: they are very safe and have been approved by the U.S. Food and Drug Administration (FDA) for this specific use.
2. Surgical Scalpels for Precise Incisions
To begin the operation, the surgeon relies on a scalpel of a sterile, single-use kind that is equipped with a #15 or #12 blade. This very sharp tool allows the surgeon to make a very accurate and clean cut in the gum tissue. Sharp, strictly controlled cutting made by a fresh scalpel blade helps the injured place to heal faster and lessens the damage to the tissues as compared to a tear. This very first step is the foundation for getting down to the tooth and bone layer in a regular, surgical way.
3. Periosteal Elevators for Tissue Reflection
After the incision point is made, the surgeon carefully employs a periosteal elevator – a telescopic tool designed for operating. With this specialized implement, the practitioner can theoretically separate and lift back the soft gum tissue, aka the mucoperiosteal flap, from the bone underneath. In doing so, direct and unobstructed visual as well as manual access to the operation zone is gained. Correct elevation supports soft tissue maintenance and also provides a sterile surgical field.
4. High-Speed Surgical Handpieces for Bone and Tooth Sectioning
The high-speed surgical handpiece is very important for the D7250 procedure; it is sometimes simply called a “drill.” This instrument takes a sterile, disposable bur to do two main things. First, the handpiece is employed by the surgeon to cut away a small, exact part of the buccal bone covering the tooth root. This clearance of bone is done to make a path for the tool to reach the targeted area.
Then, the surgeon is allowed to use the same handpiece to “section”, i.e., to cut, a multi-rooted tooth into separate pieces. This sectioning step lets the surgeon insert the handpiece and remove each root individually through a smaller opening, which saves bone, and the huge extraction force is greatly lessened.
5. Surgical Luxators and Elevators for Atraumatic Tooth Removal

With surgical luxators and elevators, surgeons can precisely target and break the tiny periodontal ligaments that hold the tooth root to the jawbone, thereby enabling the smooth and gentle removal of the tooth. These instruments, which feature thin, sharp tips, are injected into the space around the root so the surgeon can work hand in hand with minuscule forces without causing any major disruption to the region. The probably uncontrolled usage of elevatory and luxatory tools would be the major reason behind accidental root extension and different adjoining-bone injuries. Those in turn yield less-instrumental but more precise, more predictable and comparatively unproblematic results incorporating at least 1 less extensive fracture.
6. Extraction Forceps for Final Tooth Retrieval
Upon the attainment of sufficient mobilization of the tooth, dental surgery forceps are the instruments of choice in the hands of the surgeon for the objective of the gentle removal of the tooth or the tiny root fragments from the alveolus. Surgical extraction forceps, which are the ones that will be employed in the operation, are most of the time different from those used in an uncomplicated extraction. In other words, they may be slimmer or more differently shaped to fit the unique surgical access made by the flap.
7. Surgical Curettes for Socket Debridement
Eventually, the tooth is removed, and the flesh around the now-empty tooth socket will be cleaned with a surgical curette by the surgeon, meticulously. This tool possesses a small, cup-shaped tip that is able to effectively scrape away tiny fragments of teeth, bones, or even infected tissue that may be left over. The thorough removal, or in this case, cleaning of the socket, is a very important step that ensures not only the prevention of infection but also better healing, as this is the stage where blood clotting, which is the basis of healing, will take place.
8. Sutures for Flap Stabilization and Healing
Last but not least, the surgeon, after repositioning the soft tissue flap, will secure it with the help of sutures. These sutures hold the tissue in its normal position, shield the underlying blood clot, and facilitate primary intention healing, which is when the wound edges join together without leaving a scar. Practitioners generally opt for non-resorbable sutures such as black silk or nylon, which are removed within 7-10 days post-operation, or resorbable sutures made of polyglycolic acid that dissolve naturally over a similar period of time, might be chosen by dentists.
9. Hemostatic Agents for Bleeding Control
For the creation of the blood clot, the doctor may also put a hemostatic agent right into the socket. The absorbable gelatin sponge (e.g., Gelfoam®) or the oxidized regenerated cellulose (e.g., Surgicel®) are very efficient materials to provide a good support for the clot. They are in charge of the bleeding control, which, however, can only be of a minor nature and at the same time offer perfect protection for the area in the process of recovery.
The D7250 Procedure: A Step-by-Step Guide for Patients
Step-by-step comprehension is an efficient way to calm the nerves of a patient who has to undergo a D7250 surgery. The sacrifice of a person’s doubts and fears into an unfolding series of carefully laid, protective, and comfort-giving routines is what defines the very process.
Step 1: Comprehensive Diagnosis and Treatment Planning
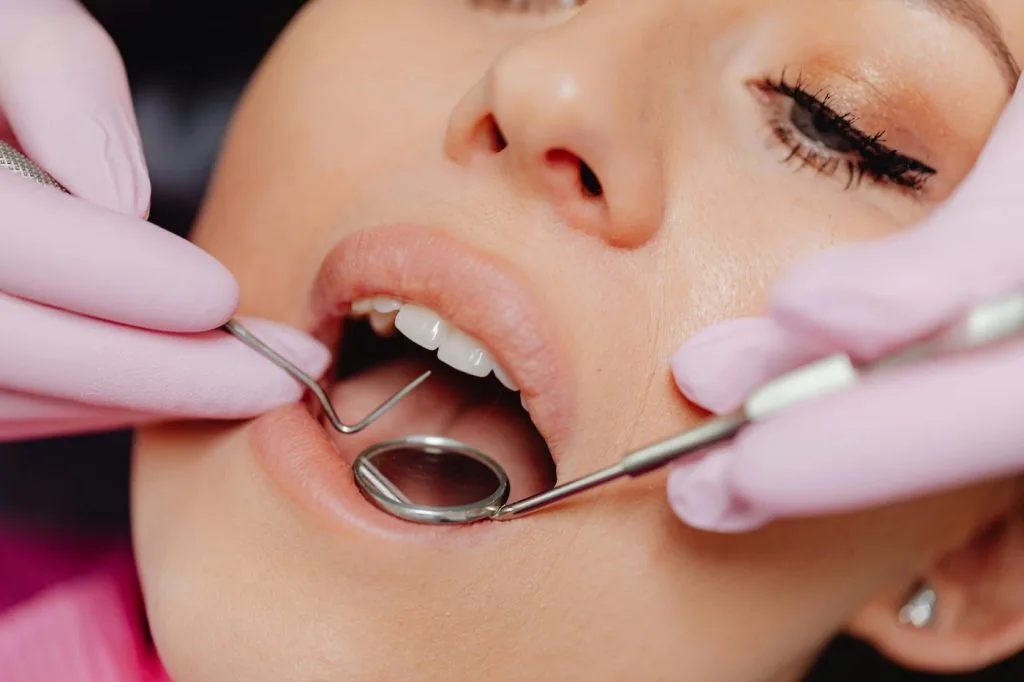
Following a clinical examination and checking dental radiographs such as panoramic X-ray and CBCT 3D scan, the dentist will know exactly what needs to be done. The 3D imaging shows the whole complex three-dimensional root canal system that is nearest to the nerves, sinus, and bone around the tooth. The surgeon, therefore, can foresee the problems and change the operation for the most secure result if he/she has a thorough plan prepared.
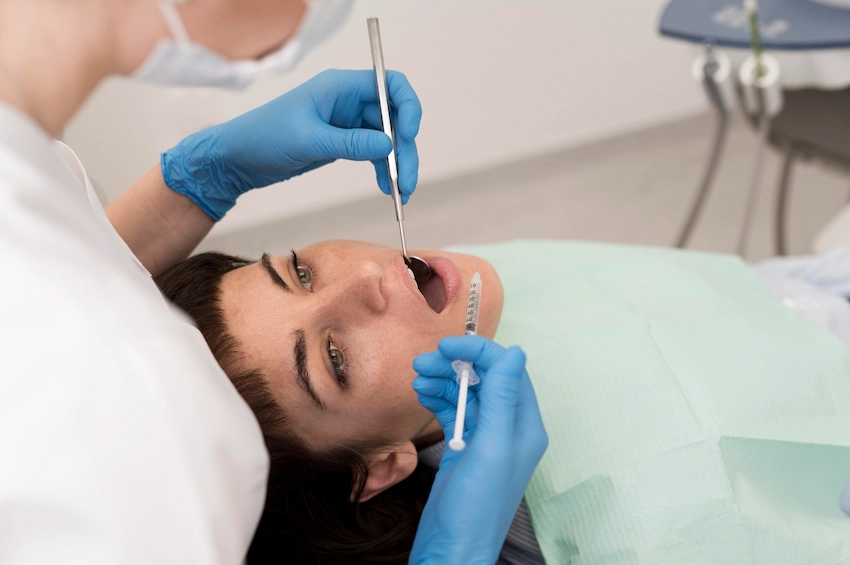
Step 2: Local Anesthesia
The doctor will locally anesthetize the area around the tooth, the bone of the jaw, and the adjoining gum on the day of the operation. Apart from the fact that you will perceive the surroundings, you will not be able to speak, and only a dull sensation will be felt. Should a patient be nervous during the procedure, the surgical team can administer sedative nitrous oxide (“laughing gas”) or oral conscious sedation that will calm the patient completely.
Step 3: Mucoperiosteal Flap Creation
It is a typical routine of the surgeon, once the local anesthetic has been administered, to make a small incision in the gum with a scalpel. After that, by using a periosteal elevator, the tissue flap is loosened from the bone and the part of the tooth to be removed will be exposed.
Step 4: Bone Removal and/or Fragmenting the Tooth into Smaller Pieces
The surgeon will use the high-speed handpiece to pinpoint exact areas to remove the limited amount of buccal bone that overlays the tooth roots will be carried out, thus the removal is being done in a very delicate way. Most probably, to proceed further, the surgeon will cut the tooth which is multi-rooted, gently separating the different roots from one another if such a situation is the case. This innovative technique essentially turns one complex extraction into several less complicated, less traumatic, and easier operations.
Step 5: Careful Tooth Elevation and Delivery
The surgeon will use surgical luxators and elevators to delicately free the tooth or root sections from the periodontal ligament. To make them mobile, they will then use forceps to deliver the tooth fragments from the socket with minimal force.
Step 6: Socket Debridement and Irrigation
The surgeon will visually examine the socket in detail and employ a surgical curette to detach any debris. Besides that, they will wash the place with a sterile saline solution to guarantee that it is spotless and does not contain even the tiniest particles.
Step 7: Flap Repositioning and Suturing
The doctor conducts a very thorough inspection of the socket and, using a surgical curette, proceeds with the removal of any debris. In addition, a sterile saline solution will be used to make sure that the place is free from even the tiniest particles and perfectly clean. The surgeon will be very careful to put the soft tissue flap back in its original place. Their next move will be to put in the stitches securing the gums, maintaining the best conditions for healing, and at the same time, facilitate stopping the bleeding.
Step 8: Post-Operative Care Instructions and Gauze Placement
Last but not least, the surgeon will have you bite down on a sterile gauze pad that has been placed over the surgical site to apply firm pressure. This is what helps the very first blood clot to form. The post-operative care instructions, which are detailed and in writing, will then be handed over to you to ensure that your recovery time at home is properly guided.
Critical Aftercare for a Successful D7250 Recovery

Your active participation in the aftercare process is essential for a smooth and rapid recovery. Following these evidence-based instructions will minimize discomfort and prevent complications.
Immediate Post-Operative Actions (First 24 Hours)
Keep firm pressure on the gauze pad for at least 30-60 minutes after surgery. A rest period together with head elevation, preferably with pillows, should also be observed. Besides, applying an ice pack to the cheek’s exterior in 20-minute intervals will work. Cool and soft foods and drinks only should be consumed and straw usage should be avoided, as the sucking motion will dislodge the vital blood clot. It is also necessary to refrain from rinsing, spitting, and smoking during this crucial first day.
Managing Discomfort and Oral Hygiene (Days 1-7)
All pain relief and anti-inflammatory medication that the surgeon prescribes for you are to be taken by you. It is also necessary to follow the surgeon’s directions very closely. Patients are allowed to start gentle mouth rinsing with salt water several times a day, especially after meals, after the first 24 hours. The soft diet should still be kept, and the regular diet can be gradually allowed as the healing progresses. Teeth can be brushed gently, but the surgical site should be avoided for the first few days.
Healing and Follow-Up in the Long-Term
Any pain and swelling, to a very great extent, should be alleviated after the first three to five days. The average time for complete gum healing is 3-4 weeks. Your surgeon will organize a follow-up appointment for the removal of non-resorbable stitches, usually 7-10 days after the surgery. During this appointment, the doctor will be able to find and confirm the healing progress as well as the successful outcome of the surgical intervention.
Conclusion About D7250: Empowering Yourself Through Knowledge

The code of dental procedure D7250 is a clear example of a very refined and foreseeable method of disposing of complex teeth. The surgical standard of care uses certain federal-grade materials, such as local anesthetics and surgical scalpels, to high-speed handpieces and special sutures, all of which are developed to ensure your safety, comfort, and long-term oral health. Knowing the exact reasons for the operation, the sophisticated materials used, and recognizing the vital role you play in your own aftercare will allow you to face the treatment with the utmost confidence. Keep on communicating with your dentist, write down your questions, and bring up your doubts. A knowledgeable patient is the dentist’s most valuable partner in achieving a successful outcome.
Sources:
- American Dental Association. (2023). Current Dental Terminology (CDT). ADA Catalog.
- Hupp, J. R., Ellis, E., & Tucker, M. R. (2018). Contemporary Oral and Maxillofacial Surgery. Elsevier Health Sciences.
- Peterson, L. J., Ellis, E., Hupp, J. R., & Tucker, M. R. (2003). Principles of Oral Surgery. Mosby.
- Fragiskos, F. D. (2007). Oral Surgery. Springer Science & Business Media.
Frequently Asked Questions About the D7250 Dental Code
The D7250 dental code refers to the surgical extraction of a tooth that requires the elevation of a mucoperiosteal flap and the removal of bone or sectioning of the tooth. It is typically used when a tooth cannot be removed using standard extraction techniques.
Several specialized materials are used during the D7250 procedure, including local anesthetics (like lidocaine), surgical scalpels, periosteal elevators, high-speed handpieces for bone and tooth sectioning, surgical luxators and elevators, and sutures to close the gum tissue after the procedure. Hemostatic agents may also be used to control bleeding.
The procedure itself is performed under local anesthesia, so you should not feel any pain during the surgery. After the anesthesia wears off, some discomfort, swelling, and bruising may occur, but this can be managed with prescribed pain relief medications.
The initial healing process usually takes about 1 to 2 weeks, with most swelling and discomfort subsiding within the first few days. Full recovery, including gum healing, may take around 3 to 4 weeks. You will likely need a follow-up appointment to check on your healing progress.
As with any surgical procedure, there are risks, including infection, bleeding, or complications with anesthesia. However, these risks are minimized when the procedure is performed by a skilled oral surgeon and with proper post-operative care.